Get Started Quickly!
Hands On Tour - Make a Geometric Bead
Can you show me how to make something? I want to get started now.
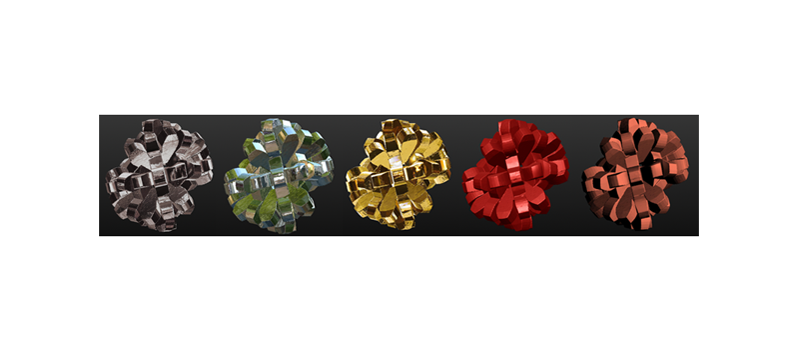
Yes! You've come to the right place. In the next slides, we will walk through each step together, and create the cool bead pictured above.
By the time you are done with this quick and easy mini-project, you will know how to use the most essential tools in MeshUP, like Library and Join.
You will also get to play with some of our coolest features, like Replicate and Subtract.
Step 1 - Open Library
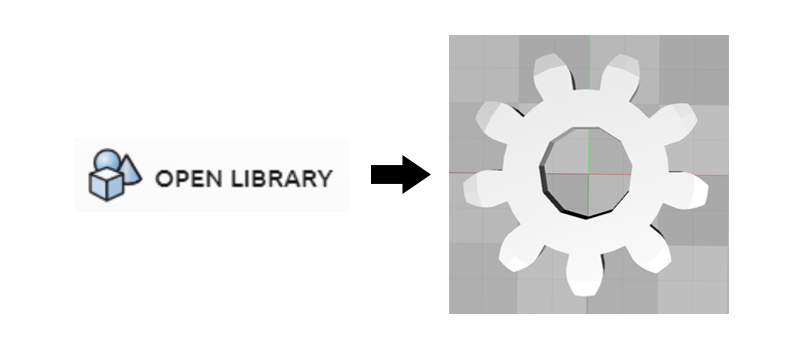
How do I get a model to play with?- Click on the Open Library button from the File menu in the top left toolbar.
- Click on the Parts category button.
- Click on the Gear with 9 teeth.
- Now the Gear model will appear in the center of the grid, as a grey mesh with no defects.
Pro Tips
- Click on the Open & Import button right next to the Library button, and you will be able to import your own 3D models into MeshUP.
- Note that this walkthrough uses the Gear model mentioned above, so if you pick another model now, your results will vary. However, these steps can be completed with any shape, so feel free to explore and have fun!
- Remember that if you import a model that is pink or red with defects, you will want to learn to use our Mesh Repair tools.
Step 2 - View & Rotate
How do I move the camera? How do I turn an object?- Left click the Gear to select the object. ( You will know when an object is selected by the yellow highlighting, and the Properties window that appears. )
- Notice the Gimbal that appears as a red, green, and blue tool.
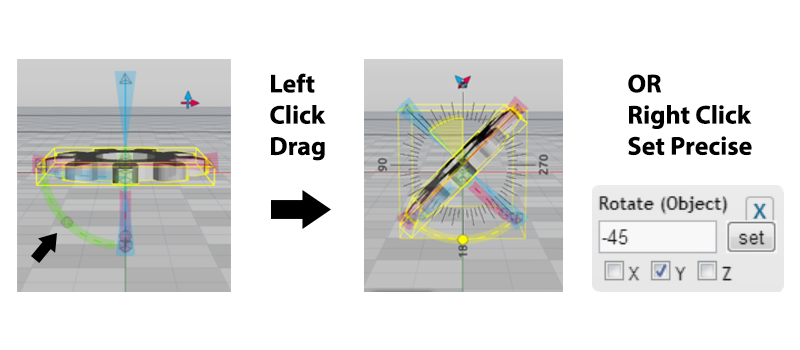
- Left click drag the mouse anywhere on the grey checkerboard grid, so that the camera moves around the object. Get a clear View of the green sphere icon for Gimbal Rotate.
- Left click drag the green sphere to Rotate the object to approximately 45 degrees either direction along the Y axis.
Pro Tips
- You will notice in the image above with click drag, we only approximately reached our goal, at 45.55 degrees. This is not a bad thing, just a stylistic choice. There will be a more organic design with manual Rotate, and a more geometric design with Precise Rotate.
- To try Precise Rotate, click the Undo button in the Edit menu in the top toolbar. Then right click the green sphere on the Gimbal to bring up Precise Rotate. Enter 45 or -45, and click Set.
- The X axis is red, the Y axis is green, and the Z axis is blue. You can Rotate along any axis, any number of degrees for different results.
Step 3 - UP
How do I use UP to turn a mesh into a volume?- Left click on the Gear to select the object.
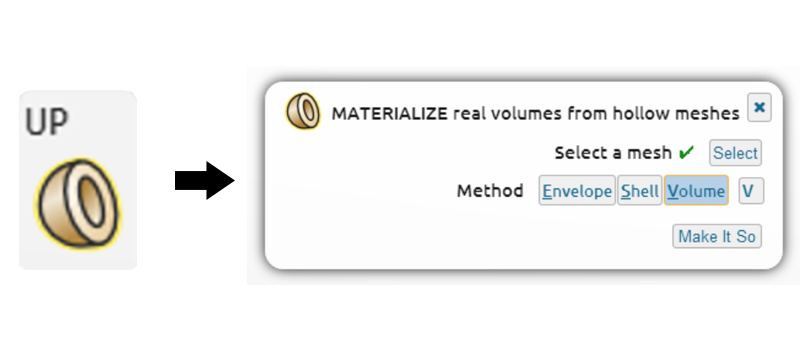
- Click the UP button in the toolbar, between Mesh and Volume.
- Leave Volume V as the default selection.
- Click the Make It So button.
- Now your grey mesh will materialize into a bronze volume!
Pro Tips
- If you decided to import your own mesh, and it is still pink or red with defects, Volume V will not work. You can either try Envelope E on red mesh, or Shell S on pink mesh.
- Check out our How To Repair Mesh walkthrough, and our guide to Mesh Repair to learn more.
- You can also launch the UP command from the Properties window, by clicking on any icon under Volume Options.
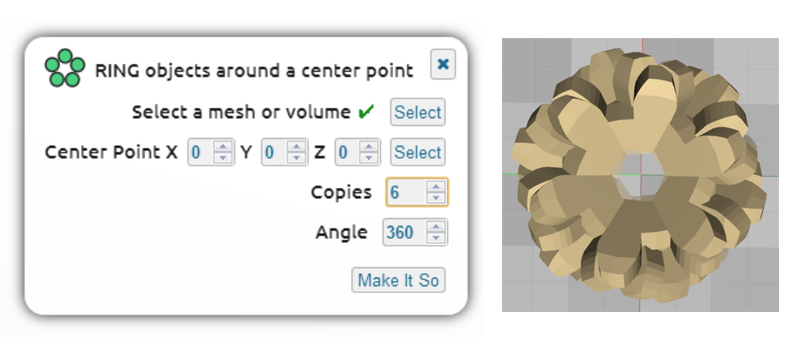
Step 4 - Replicate Ring
How do I multiply my object into a circular pattern?- Left click on the Gear to select the object.
- Click on the Ring button in the Replicate menu of the top toolbar.
- Enter a value of 6 into the Copies field.
- Leave the rest of the defaults as is.
- Click Make It So
- Now there will be a total of 6 Gears in the scene, replicated into a ring around the Center Point ( which was 0,0,0 in this case, i.e. the center of the grid ).
Pro Tips
- Try entering different numbers into the Copies field to get different effects.
- Note that the higher number of Copies you choose, the more processing time it will take.
- This might be a good time to check out our System Requirements!
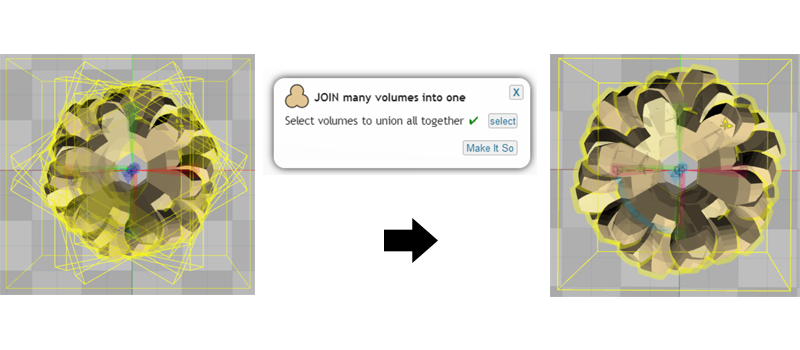
Step 5 - Select All & Join
How do I select and join all the objects together?- To select all the objects in the scene, press the letter A on your keyboard.
- Click on the Join button from the Volume menu in the top toolbar.
- Click Make It So.
- Now all 6 Gears will be joined into one object.
Pro Tip
- To select all ( or some ) of the objects in the scene, you can also hold down the Alt key while you left click drag a yellow selection box around the desired objects.
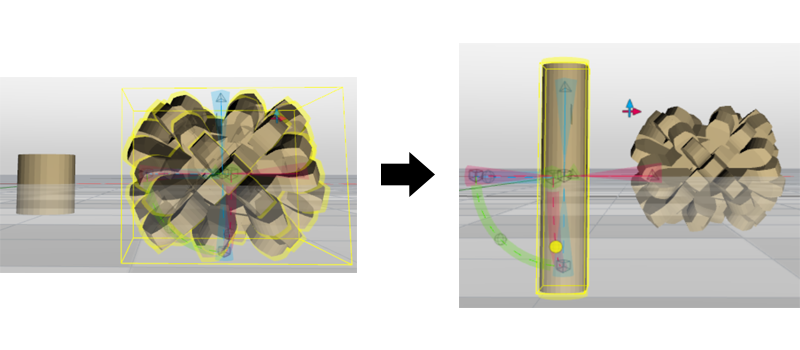
Step 6 - Translate & Scale
How do I move and resize a model?- Left click on the bead to select it.
- Left click drag any of the triangle Translate tools on the Gimbal, to move the bead out of the center of the grid.
- Click on the Open Library button, click on the Geometry category button, and click on the cylinder model image.
- Now the cylinder model will appear in the center of the grid, as a grey mesh with no defects.
- Left click on the cylinder to select it, click on the UP button, leave the default V selected, and click Make It So.
- Left click drag the cylinder's blue cube Scale tool on the Gimbal, to elongate the cylinder along the Z axis, until it is approximately twice as tall as the bead.
- Leave the cylinder in place, and left click to select only the bead.
- Click drag the bead back into the center using the triangle Translate tool on the Gimbal, so that the cylinder is sticking out of both ends of the center of the bead.
Pro Tip
- Remember you can also right click the triangle Translate or sphere Scale tools on the Gimbal to bring up the ability to enter Precise values.
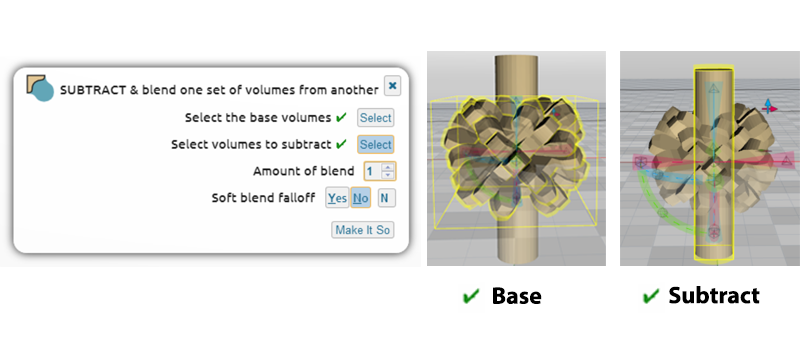
Step 7 - Subtract & Blend
How do I create new shapes?- Make sure that only the bead is selected, and not the cylinder.
- Click on the Subtract button in the Volume menu.
- The first select box should have a green checkmark. If not, click the first select box, and then click the bead. This will be the base, and will not be subtracted.
- Now click the second select box, and then select the cylinder. This will be the shape that gets subtracted from the base. You should now have two green checkmarks.
- Fill in a Blend value of 1. This will smooth the subtraction out by blending the objects as they subtract.
- Click Make It So.
- Now you have a bead with a nice big hole going through the middle.
Pro Tips
- A higher Blend value will take more processing time. If it takes too long, try a smaller Blend value.
- See our System Requirements if you haven't already!
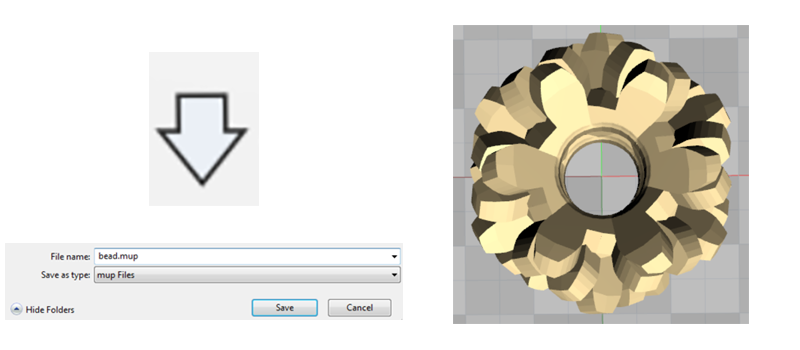
Step 8 - Save Volumes
How do I save my shiny new volumetric bead?- Click the Save button in the File menu
- Enter a name for your file, such as bead.mup
- Choose the folder location you prefer
- Click Save in the folder window
Pro Tip
- Now you can Open your volumetric bead any time, and all your hard work making it into a volume will be preserved.
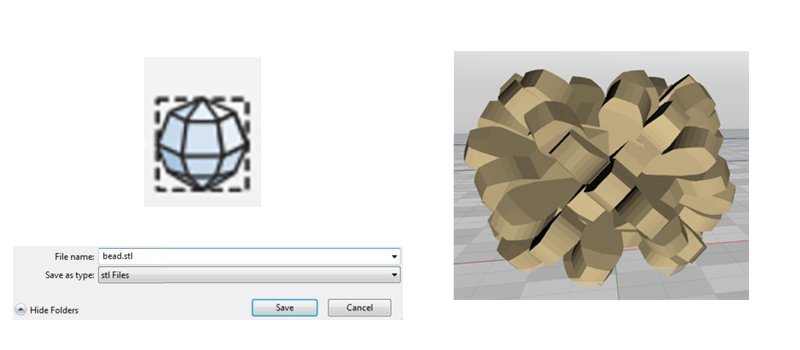
Step 9 - Export a Mesh
Now that I backed up my bead as a volume, how do I make an STL, OBJ, or PLY mesh file?- Click the Export button in the File menu, and choose what type of file you want.
- Leave the defaults as is for a watertight mesh. Exporting the mesh as not watertight is of course faster.
- MeshUP will process the volume back into a mesh, and then bring up the window for choosing where to save it.
- Enter a name for your file, such as bead.stl
- Choose the folder location you prefer
- Click Save in the folder window
Pro Tips
- Saving a MUP file is very fast! However, exporting back into mesh can take a few minutes on models with complex geometry.
- See our System Requirements if Export takes too long.
- Check out How To Export Mesh walkthrough for more tips on exporting.
- If you want to understand more, try our introduction on Volume vs. Mesh.
Congratulations, you just learned how to use some of the most essential, and most impressive tools in MeshUP!

Fun Fact
Did you know that beads represent the emergence of modern symbolic human behavior?
Beads are used for everything from currency to decoration. The skills and abstract thinking necessary to manufacture these tiny little trinkets make them a key milestone in our history of developing consciousness and technology.
Professor Nick Barton, from the Institute of Archaeology at the University of Oxford, says: “…bead manufacturing probably arose independently in different cultures and confirms a long suspected pattern that humans with modern symbolic behaviour were present from a very early stage at both ends of the continent, probably as early as 110,000 years ago.”
And now you have helped evolve the art even further, by learning to make your own beads using truly modern cutting edge technology.
Have fun playing with the tools you just learned to use, and see what else you can dream up!