Mesh

Overview
How do I repair my pink or red mesh?
There are 3 types of Mesh Repair, and it's fun and easy to try them all!
Each repair tool has different options. If you try the defaults and still have defects, then it's time to start changing the repair settings and trying out all the options.
If you are looking for the difference between a mesh and a volume, or simply want to understand why repairing your mesh is useful, check out our introduction on Volume vs. Mesh.

Seam
How do I repair tiny cracks while leaving larger holes untouched?
The Seam crack repair tool is super easy to use.- Try this tool first, since it can resolve lots of tiny holes, while leaving larger ones that may be intentional untouched.
- You don't even have to pick any settings! So easy!

Patch
How do I repair larger holes?
The Patch holes repair tool is also easy to use, and you get a few options in the settings to play with in case you still have holes after trying the default settings.
Type of Hole Repair- Flat - The default setting for patching holes is F for Flat, which closes the hole in a flat style.
- Round - If you want a softer rounded style in the patching of holes, try R for Round.
Target Edge Size
- 0 - Leave this at the 0 default for automatic edge sizing.
- If you choose a number, this determines the length of the sides of the triangles that are used to patch the hole.
Hole ID
- All - Leave this at A for All to attempt repair on all holes in the model.
- Number - Enter the number of the specific hole tag you want to repair, like 7, if you don't want to repair all holes.

Seal
How do I close up surface deformations or break apart meshes?
Is the surface broken up by intersecting mesh edges or other surface defects? Seal the surface of your mesh, or break it apart into multiple meshes with Separate Shells.- Intersection - Try I to merge together intersecting mesh edges.
- Degenerate - Try D to remove duplicate triangles. This happens when multiple triangles share at least two or three overlapping vertices.
- Separate - Try S to break apart one mesh with defects into multiple meshes which may be easier to repair individually. Remember, you can Join them back together after!
Properties
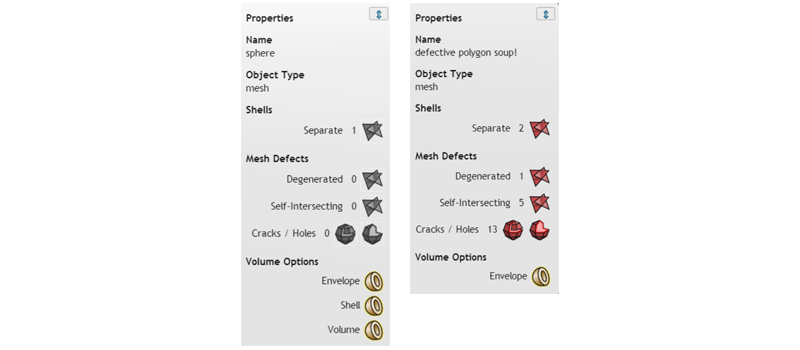
How do I know what kinds of defects a selected mesh has?
That's a great question! When you select an object, the Properties window appears. This is great for two reasons:- You can see quickly what kinds of defects are in the mesh. Grey icons mean no defects. Red icons mean it's time to play with Mesh Repair!
- If an icon is red, you can simply click on it, and it will launch the correlating Mesh Repair tool, and automatically fill in the settings for you. That's pretty cool!
Next Steps
Okay, I repaired my mesh as much as possible - what do I do next?
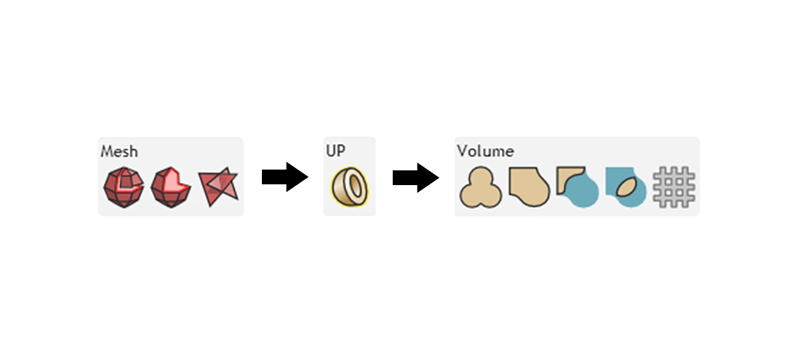
- Make a Volume - First you will want to head over to the UP button, which turns your mesh into a volume, even if you still have a red mesh with thousands of defects. ( Envelope is powerful like that! )
- Play with Tools - Then you will be able to play with our fun Volume tools, like Join, Blend, and Subtract. See our Get Started Quickly introduction for a hands on project using Volume tools. And our How To Blend Volumes walkthrough is easy to follow as well.
- Learn More! - If you are still wondering about exactly why it helps to repair mesh and convert it to a volume, check out our introduction on Volume vs. Mesh.