Table of Contents
Subtract, Intersection, and Union Tutorial
'Carve' out a cup from two basic shapes, a box and a sphere - no modeling skills required!
TIP: Remember to pay attention to the bottom right hand corner - this is where the progress bar for each operation will be displayed.
Step 1: Sphere
Open the sphere: File > Open Stock Model > Sphere. Notice that it comes in as a grey color, meaning it has no errors.
MeshUP will automatically detect issues with an imported object and display them with different colors. The Properties dialogue box will list the types of issues (coming soon).
Before working with any imported objects in MeshUP, you must convert them to one type of Volume:
- Envelope: this will work with any mesh, even polygon soup! Envelope can be thought of as inflating the object with air. The higher the offset, the more fine detail you will lose.
Shell: requires the mesh has no intersections, degenerates, flipped faces, cracks but it can have holes. Shelling produces a one sided offset and can be thought of as a single sided envelope. Shelling preserves the positive normal surface, so on one side you get the exact surface, on the side the offset is applied.- Volume: requires the mesh to be completely manifold: no intersections, degenerates, flipped faces, cracks or holes.
For this tutorial we will convert everything to Volumes.
Select the sphere, click on the Volume icon from the menu and type V.
The sphere will turn from grey to tan, which means it is now considered a Volume.
Step 2: Box
Open the box: File > Open Stock Model > Box. Select it, then click on the Volume icon from the menu and type V.
Step 3: Move, Scale
Select the box volume object and adjust its size and position such that its center coincides with the center of the sphere and all the faces intersect the sphere.
Step 4: Intersection
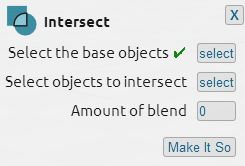
Select the box, then click on the Intersect button. Select Base Object will have a green check box next to it.
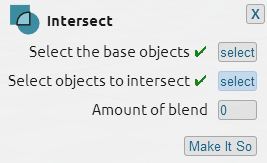
Next to Select Objects to Intersect With, click once on the Select button. The Select box will turn blue. Click once on the sphere and a check mark will now appear next to this second Select box. Click Make It So.
(Note that Blend is not yet available in the current version of the Preview.)
Watch the progress bar on the lower right hand corner to know when the operation is complete.
Step 5: Open Cylinder
Open the cylinder: File > Open Stock Model > Cylinder.
Select it, then click on the Volume icon from the menu and type V.
Step 6: Subtraction
Select the box/sphere, then click on the Subtract button. Select Base Object will have a green check box next to it.
Next to Select Objects to Subtract, click once on the Select button. The Select box will turn blue. Click once on the cylinder and a check mark will now appear next to this second Select box. Click Make It So.
Inspect the newly created volume object as the result of the subtraction.
Step 7: Torus & Union
Open the torus. Select it, then click on the Volume icon from the menu and type V.
Move,scale and rotate the torus into position so it becomes the handle for this cup.
Select the cup, then click on the Union button. Select Base Object will have a green check box next to it.
Next to Select Objects to Union With, click once on the Select button. The Select box will turn blue. Click once on the torus and a check mark will now appear next to this second Select box. Click Make It So.
Inspect the newly created volume object as the result of the union.
Merry Modeling!


